
JBL Go 4 - Ultra-Portable, Waterproof and Dustproof Bluetooth Speaker, Big JBL Pro Sound with Punchy bass, 7-Hour Built-in Battery, Made in Part with Recycled Materials (Black)
Now retrieving the price.
(as of July 30, 2026 16:30 GMT +00:00 - More infoProduct prices and availability are accurate as of the date/time indicated and are subject to change. Any price and availability information displayed on [relevant Amazon Site(s), as applicable] at the time of purchase will apply to the purchase of this product.)Summary
- Opening a Shopify store starts with a free 3-day trial and takes less than a day to set up
- You’ll need to choose a plan, pick a theme, add products, configure payments and shipping, and then launch
- Niche and product selection matter more than theme aesthetics for long-term success
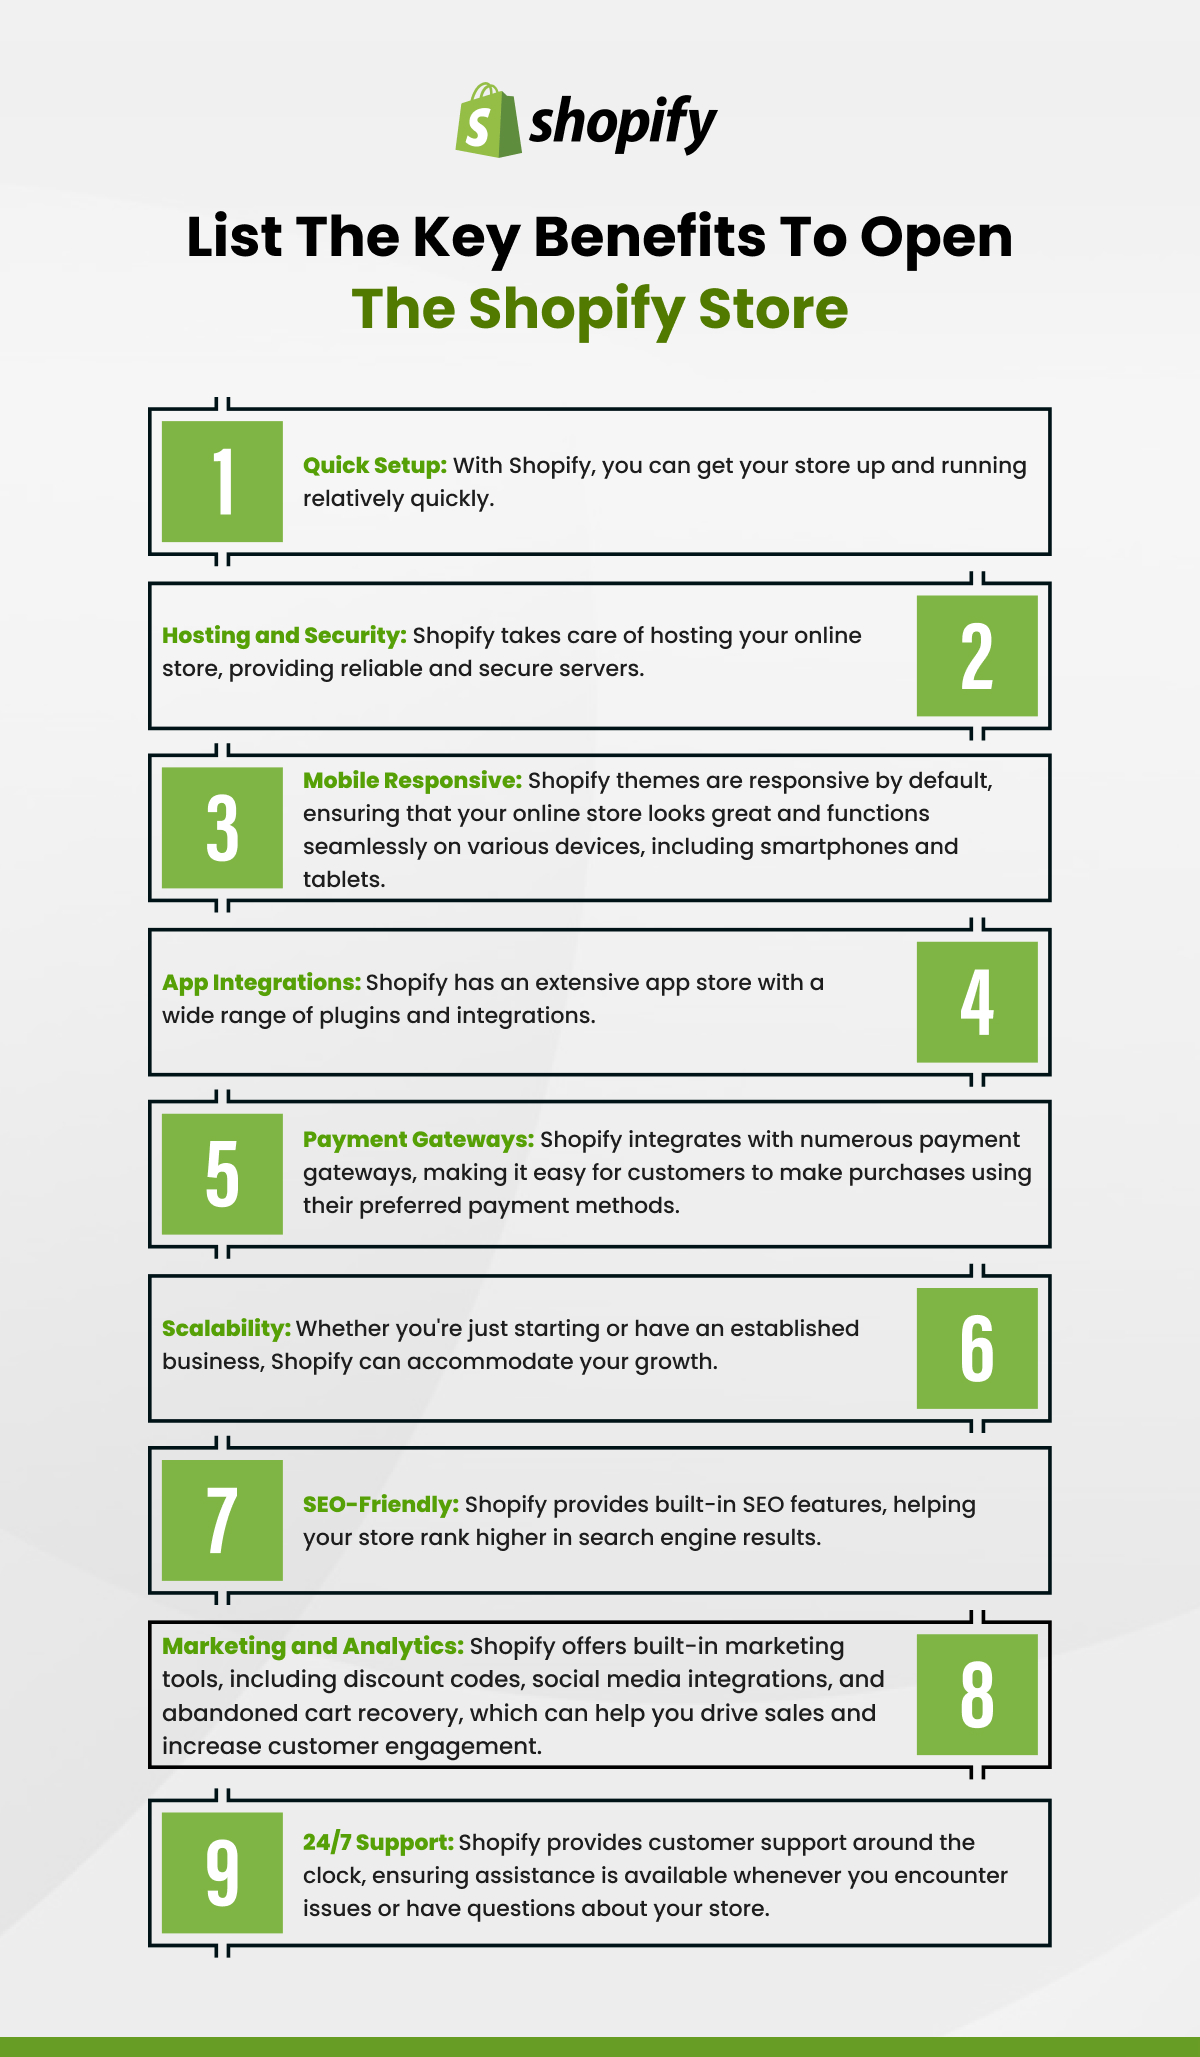
- Shopify handles hosting, security, and payment processing natively
- A soft launch with a small ad test or organic campaign is a smarter first step than waiting for perfection

Step by Step Guide on How to Open a Shopify Store
Step 1: Create Your Shopify Account
Go to shopify.com and click Start free trial. Shopify offers a 3-day free trial with no credit card required, followed by a discounted first month.
You’ll need to provide:
- Your email address
- A store name (this can be changed later)
- Some basic information about your business type and what you’re planning to sell
Once you submit, Shopify redirects you to the admin dashboard. This is your command center — every setting, product, and order lives here.
Choose your plan carefully. The three main options are:
| Plan | Monthly Cost | Best For |
| Basic | $39/month | Solo sellers, new stores |
| Shopify | $105/month | Growing stores, small teams |
| Advanced | $399/month | Scaling stores, advanced reporting |
If you’re just starting out, the Basic plan covers everything you need to launch and get your first sales.
Read Also: How to Build a High-Converting Shopify Store
Step 2: Choose Your Niche and Define Your Products
Before you touch themes or settings, spend time on this step. Your niche determines your audience, your marketing strategy, and how competitive your space is.
A good niche is:
- Specific enough to have a clearly defined buyer
- Broad enough to support a catalog of products
- Something you can serve with authority or sourcing advantages
If you’re selling physical products, research competitors, check demand on Google Trends, and validate pricing before you commit to inventory. If you’re dropshipping, tools like DSers or Spocket connect directly to Shopify and let you test products without upfront stock.
Common first-store mistakes include picking a niche that’s too broad (“general merchandise”), too crowded (“phone cases”), or has no clear buyer in mind. Narrowing your focus significantly improves your conversion rate and makes marketing much easier.
Read Also How Much Does it Cost to Hire a Shopify Expert
Step 3: Select and Customize Your Shopify Theme
Go to Online Store → Themes in your admin. Shopify offers 13 free themes and a large library of premium themes ($150–$400 one-time cost).
For most new stores, a free theme is perfectly sufficient. The Dawn theme (Shopify’s default) is fast, clean, and optimized for conversions. The Craft, Sense, and Refresh themes are also solid free options depending on your store category.
When choosing a theme, prioritize:
- Mobile responsiveness (over 70% of ecommerce traffic is on mobile)
- Page load speed
- Clear product display and easy navigation
- Built-in conversion elements (sticky cart, product zoom, reviews)
To customize your theme, click Customize next to your selected theme. You can edit colors, fonts, homepage sections, navigation, and layout without touching code. Every change is previewed in real time before you publish.

Step 4: Add Your Products
Go to Products → Add product. For each product, you’ll fill in:
- Title — clear, descriptive, and keyword-relevant
- Description — focus on benefits, not just features; answer the buyer’s main question
- Images — high quality, well-lit, multiple angles; avoid stock photos where possible
- Pricing — set your sale price and compare-at price if applicable
- Inventory — SKU, barcode, and stock quantity tracking
- Shipping — weight and dimensions if you’re shipping physical goods
- Variants — sizes, colors, or configurations
Organize products into Collections (categories). This makes navigation cleaner and helps customers find what they’re looking for without browsing your entire catalog.
| Product Page Element | Why It Matters |
| Clear title with keyword | Improves SEO and scan-ability |
| Benefit-led description | Answers “why should I buy this?” |
| Multiple high-quality images | Reduces purchase hesitation |
| Visible reviews section | Builds social proof |
| Clear size/variant guide | Reduces returns and confusion |
Step 5: Set Up Payments
Go to Settings → Payments. Shopify Payments is the native option and the simplest to enable — it processes cards, Apple Pay, Google Pay, and Shop Pay with no third-party setup required.
If Shopify Payments isn’t available in your country, or you prefer an alternative, you can integrate PayPal, Stripe, or other supported gateways.
Transaction fees matter. Shopify charges an additional transaction fee (0.5%–2% depending on your plan) if you use a third-party payment gateway instead of Shopify Payments. On the Basic plan, this is 2% per transaction — a meaningful cost at volume.
Enable Shopify Payments where available. It eliminates the transaction fee and simplifies reconciliation.
Read Also Shopify Transaction Fees
Step 6: Configure Shipping
Go to Settings → Shipping and Delivery. Here you set your shipping rates for each geographic zone.
Your main options:
- Free shipping — absorb the cost into your pricing
- Flat rate — charge a fixed amount regardless of order size
- Calculated rates — charge real-time carrier rates (UPS, USPS, FedEx) based on weight and destination
- Free shipping above a threshold — e.g., free on orders over $50
For new stores, a flat rate or conditional free shipping setup is the easiest to communicate to customers and the easiest to manage operationally.
If you’re offering free shipping, check out our dedicated guide on how to offer free shipping on Shopify to set it up correctly without hurting your margins.
Step 7: Set Up Your Domain
Your default Shopify URL is yourstore.myshopify.com. For a professional storefront, you need a custom domain — something like yourbrandname.com.
You can:
- Buy a domain through Shopify (Settings → Domains → Buy new domain) — starts at ~$14/year
- Connect an existing domain purchased through GoDaddy, Namecheap, or another registrar
A custom domain improves trust, brand recognition, and SEO. Don’t launch without one.
Step 8: Configure Legal Pages and Store Policies
Go to Settings → Policies. Shopify can auto-generate:
- Privacy Policy
- Terms of Service
- Refund Policy
- Shipping Policy
Review and customize each one to reflect your actual practices. Transparent policies reduce disputes, build customer trust, and are legally expected in most markets. Make sure your refund policy is honest and specific — vague policies lead to chargebacks.
Step 9: Test Your Store Before You Launch
Before going live, run through these checks:
- Place a test order using Shopify’s Bogus Gateway (Settings → Payments → Bogus Gateway)
- Check your storefront on mobile and desktop
- Review all product pages — prices, variants, and descriptions
- Confirm that shipping rates calculate correctly at checkout
- Test your email notifications (order confirmation, shipping confirmation)
- Verify that your domain is connected and loading correctly
Fix any issues before you remove the password protection and open to the public.
Read Also Convert Shopify Store To Mobile App
Step 10: Launch and Drive Your First Traffic
Removing the password protection is easy — go to Online Store → Preferences and uncheck the password protection box. Your store is live.
Now comes the part most new store owners underestimate: traffic. A live store with no visitors generates no sales. Your launch strategy should include at least one of the following:
- Paid ads — Meta (Facebook/Instagram) or TikTok ads targeted to your niche audience
- Organic social — consistent posts on 1–2 platforms your target customer uses
- Email — if you collected emails pre-launch via your password page
- SEO content — blog posts targeting search terms your buyers use
Don’t wait for the perfect strategy. A small test campaign with a modest budget tells you more than months of preparation.
For stores exploring alternative revenue models, our guide on how to sell on Shopify without inventory covers dropshipping and print-on-demand setups you can integrate from day one.
Key Takeaways
- Opening a Shopify store takes less than a day — the hard part is niche selection and marketing, not the setup
- The Basic plan is sufficient for most new store owners; upgrade as your revenue grows
- Shopify Payments is the simplest and most cost-effective payment option in most markets
- A custom domain, clear policies, and mobile-optimized theme are non-negotiable for a professional launch
- Test your store thoroughly before going live, then launch with a concrete traffic plan — even a small one
Frequently Asked Questions
How Long Does It Take to Open a Shopify Store?
The technical setup takes two to four hours. Product photography, copywriting, and niche research take longer. Most first-time store owners are ready to launch within one to two weeks of starting.
How Much Does It Cost to Open a Shopify Store?
The Basic plan is $39/month. Add a domain (~$14/year) and any paid theme or apps. Total first-year cost for a lean setup is typically $500–$700, not counting inventory or marketing spend.
Do I Need Coding Skills to Open a Shopify Store?
No. Shopify’s theme editor lets you customize your store visually with no code. For advanced customizations, Liquid (Shopify’s template language) is used, but it’s not required to launch a functional store.
What Should I Sell on My Shopify Store?
Choose a product category with clear demand and a defined target buyer. Research competitors, check search volume for your category, and validate pricing before investing in inventory. Avoid overly broad niches or highly saturated markets without a differentiation strategy.
Can I Start a Shopify Store with No Money?
You need at a minimum a Shopify plan ($39/month) and a domain. Beyond that, dropshipping and print-on-demand models let you sell without upfront inventory. Marketing budget is optional at launch but significantly speeds up first sales.
Conclusion
Need expert help setting up or customizing your Shopify store? Get in touch with Folio3’s Shopify team for development, design, and launch support.
Read our article is Shopify Good For Small Businesses to get more details.
Source: https://ecommerce.folio3.com/blog/how-to-open-shopify-store/
